Remap Any Key on Your Keyboard
SharpKeys lets you reassign or disable any keyboard key on Windows using the registry. No background processes, no scripts — just pick a key, map it, and you’re done.
| Map From | Map To |
|---|---|
| Caps Lock Key | ✕ Turn Key Off |
| Left Windows Key | Left Ctrl Key |
| Scroll Lock Key | Insert Key |
| Right Alt Key | Application Key |
What Is Sharpkeys?
A free Windows utility that remaps keyboard keys through the registry — no background processes, no scripts, no ongoing overhead.
Sharpkeys is a free, open-source tool for remapping keyboard keys on Windows. Built by Randy (RandyRants LLC), it provides a graphical interface for editing the Windows Registry’s Scancode Map, the mechanism Windows uses to translate physical key presses into characters and actions. You don’t need to open Registry Editor or work with hex values directly.
The workflow is simple: open Sharpkeys, pick the key you want to change, choose what it should do instead, and click “Write to Registry.” Log out and back in, and that’s it. Your keyboard now behaves as configured across every application, every user session, and every reboot. Sharpkeys does not run in the background after setup. The remapping lives in the OS, not in a process intercepting keystrokes.
That’s different from how most remapping tools work. The common approach hooks into keystrokes at runtime, which requires the program to keep running. Sharpkeys writes a registry entry and exits. No startup overhead, no tray icon, and no risk of losing your layout if the program gets closed unexpectedly.
People use it for all sorts of purposes: disabling Caps Lock (the most common use case), remapping the Windows key to avoid triggering it during games, moving Escape within closer reach for Vim users, or reassigning keys that are in the wrong spot on non-standard keyboard layouts. Sharpkeys handles up to 104 simultaneous mappings, which covers most real-world needs without getting complicated.
It runs on Windows 10 and Windows 11. Legacy support goes back to Windows XP for older hardware. Administrator privileges are required to write to the registry, and .NET Framework 4.0 is needed on systems that don’t already have it. The installer is under 530 KB. Version 3.9.4 added ARM and ARM64 support alongside the standard x64 and x86 builds.
Disable Keys Permanently
Turn off Caps Lock, Scroll Lock, or any key you never use. The change survives reboots.
Type Key Detection
Press the key you want to remap and Sharpkeys identifies it automatically. No list-hunting.
Import and Export Layouts
Save your remapping configuration and move it to another machine in a few clicks.
Registry-Native, No Service
Sharpkeys writes the mapping and closes. The OS handles the rest at the hardware level.
Sharpkeys is free and takes about two minutes to set up. Download it here and see how it works.
What SharpKeys Actually Does
Ten things SharpKeys handles well — all of them registry-based, all of them free, and none of them require anything running in the background.
Press a Key to Identify It
Click Add and press the key you want to remap. SharpKeys reads its scancode immediately — no looking up codes in a table, no guessing. The key name shows up in the list on the spot.
Up to 104 Keys at Once
All 104 remappings stay active together. Whether you are changing one key or rebuilding your entire layout, SharpKeys writes the full set to the registry in a single operation.
Disable Any Key Entirely
Assign “Turn Key Off” to Caps Lock, Insert, or any key that keeps getting in your way. It stops registering completely until you delete the mapping and rewrite the registry.
No Background Process
SharpKeys writes to the registry, then you close it. Nothing runs in the background afterward. Your CPU and RAM are not touched once the mappings are saved.
Survives Every Restart
Remappings sit in the Windows Scancode Map registry entry. Restart, hibernate, sleep — the keys come back remapped every time. You set them once and you are done.
Works Across Every App
Remapping happens at the Windows level, below any individual application. The same layout applies in your browser, terminal, Office, VS Code, and any game — no per-app setup needed.
Import and Export Layouts
Save your current mapping as a file and reload it later. Handy when setting up a new PC, restoring after a Windows reinstall, or handing a config to a teammate who wants the same layout.
No Registry Hex Editing
SharpKeys writes the Scancode Map value for you. You pick keys from a dropdown; the tool generates the hex bytes and commits them. You never have to open regedit or touch a hex string manually.
Open Source Under MS-PL
The source is on GitHub with no license cost, no ads, and no telemetry. If you want to check what SharpKeys writes to your registry before running it, every line of code is right there to read.
526 KB MSI Installer
The installer weighs 526 KB. It downloads in seconds, does not bundle extra software, and the only things added are the Start Menu shortcut and a .NET dependency check on first launch.
System Requirements
SharpKeys runs on virtually any modern Windows PC. Check the table below to confirm your system is compatible before downloading.
| Component | Minimum | Recommended |
|---|---|---|
| Operating System | Windows 10 (any edition) | Windows 11 (Home or Pro) |
| Architecture | x86 (32-bit) or x64 (64-bit) | x64 (64-bit) or ARM64 |
| .NET Framework | .NET Framework 4.0 Client Profile | .NET 4.8 (built into Win 10/11) |
| RAM | 512 MB available | Any amount — uses under 30 MB |
| Disk Space | 2 MB free | 2 MB (installer is 526 KB) |
| User Privileges | Administrator account required to write to the Windows Registry | |
| Internet Connection | Not required after download | Fully offline after install |
| Legacy Support | Windows XP, Vista, 7, 8 (with .NET 4.0) | Windows 10 / 11 recommended |
Download SharpKeys
Free, open-source keyboard remapper for Windows. No ads, no bundled software, no account required. Pick your installer and get started in under a minute.
SharpKeys 3.9.4 — Windows Installer (MSI)
The standard installer for Windows x64 and x86 systems. Installs via Windows Installer (MSI) with no admin prompts beyond the initial setup. Requires .NET Framework 4.0 or newer, which ships with Windows 10 and 11 by default.
Portable ZIP
No installation needed. Includes builds for ARM and ARM64 in addition to x64/x86. Extract and run directly.
Download ZIPMicrosoft Store
Install from the official Microsoft Store. Auto-updates and sandboxed install. Best option for managed environments.
Get from StoreSharpKeys in Action
Real screenshots of the SharpKeys interface. Click any image to view it full size.


Ready to configure your own layout? Download SharpKeys free and get started in under two minutes.
Getting Started with SharpKeys
From download to your first working key remap in under five minutes. No scripting, no coding — just a few clicks and a log out.
Downloading SharpKeys
Head to the Download section on this page to grab the latest version of SharpKeys (3.9.4, released April 2025). Two formats are available: an MSI installer and a portable ZIP archive. For most users on Windows 10 or 11 with a standard x64 or x86 system, the MSI installer is the right choice. It handles the .NET dependency check automatically and creates a Start Menu shortcut so you can find the app later.
The ZIP download is better if you want to run SharpKeys without installing anything, or if you have an ARM or ARM64 machine — Surface Pro X, Copilot+ PC, or any Snapdragon-based Windows laptop. The ZIP includes separate executables for ARM and ARM64 alongside the standard x64 and x86 builds. Extract the folder anywhere and run the correct .exe for your hardware.
A third option is the Microsoft Store. Search “SharpKeys” directly in the Store app or use the Store link in the Download section. The Store version auto-updates when new releases come out. All three sources — direct MSI, ZIP, and Store — install the exact same software from the same developer (Randy, RandyRants LLC).
Installing SharpKeys (MSI Walkthrough)
Double-click the downloaded sharpkeys394.msi file. Windows may show a User Account Control (UAC) prompt asking you to allow the installer to make changes. Click Yes to continue. This prompt appears for any software writing to system directories.
Windows SmartScreen warning: On some machines you will see a blue SmartScreen dialog: “Windows protected your PC.” Click “More info”, then click “Run anyway.” SmartScreen flags software from publishers not enrolled in extended validation — this is common for open-source tools. SharpKeys is clean; the full source code is on GitHub.
Step-by-step:
- Welcome screen appears — click Next
- Accept the MS-PL (Microsoft Public License) agreement — click Next
- Choose install folder (default:
C:\Program Files\SharpKeys) — leave as-is unless needed - Click Install — a second UAC prompt may appear
- Installation completes in a few seconds — click Finish
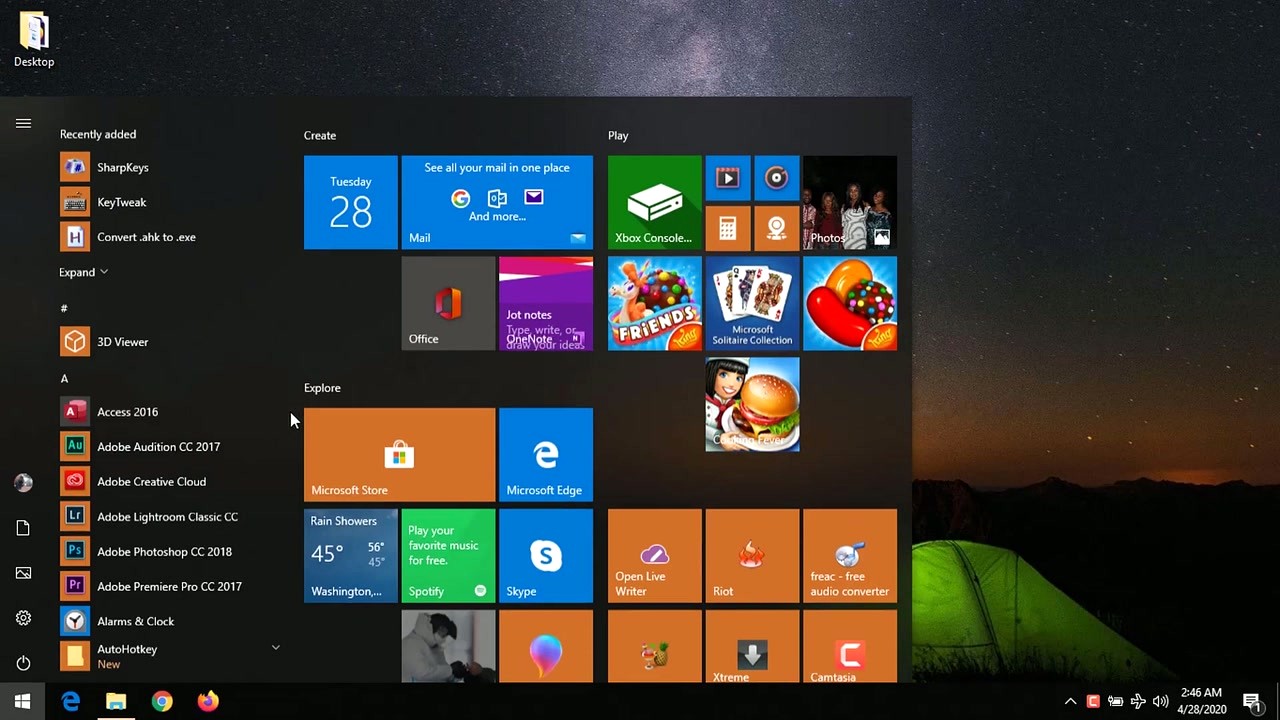
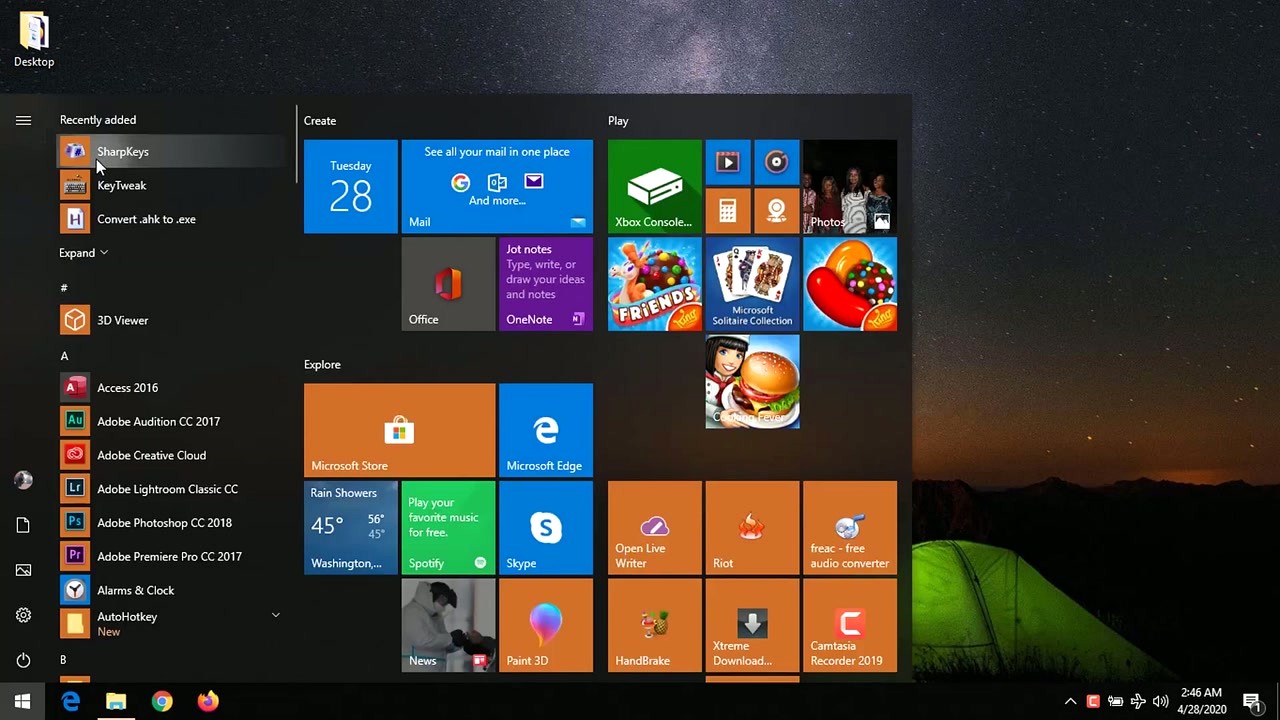
SharpKeys now appears in the Start Menu under S. No tray icon, no background process. You do not need to restart before opening it — a restart or log-out is only needed after you write remappings to the registry.
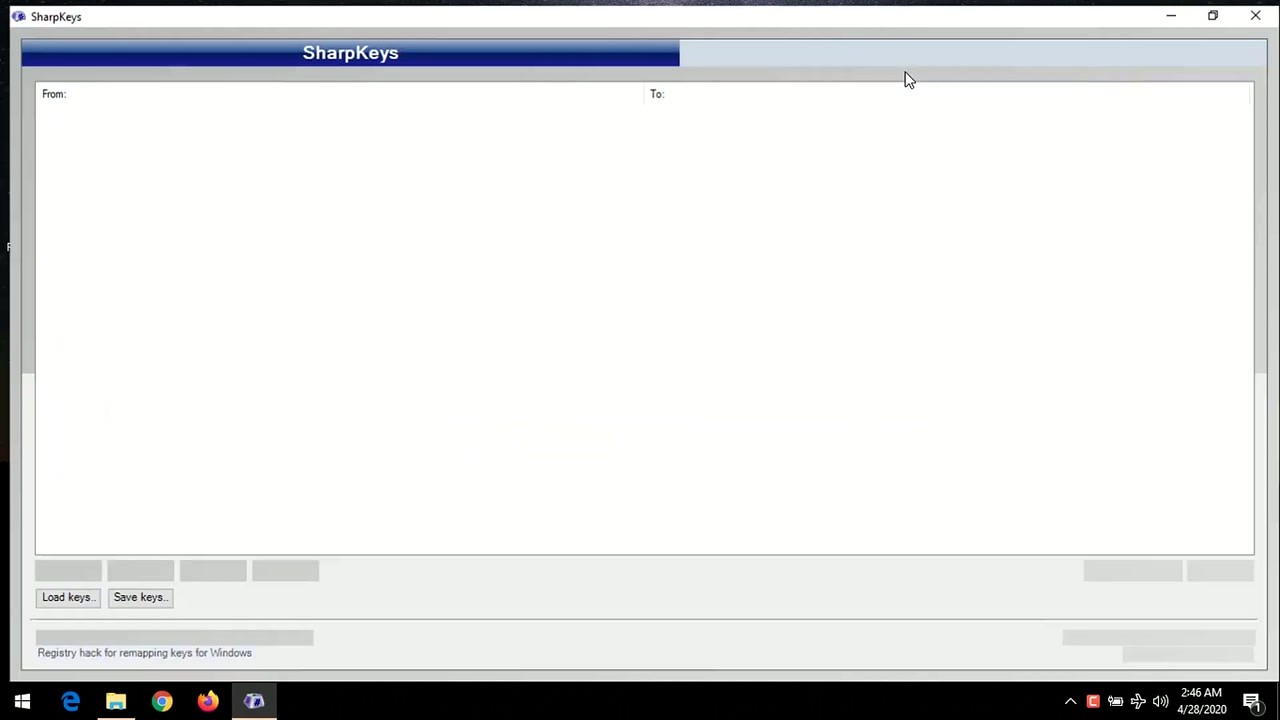
First Launch: Interface Overview
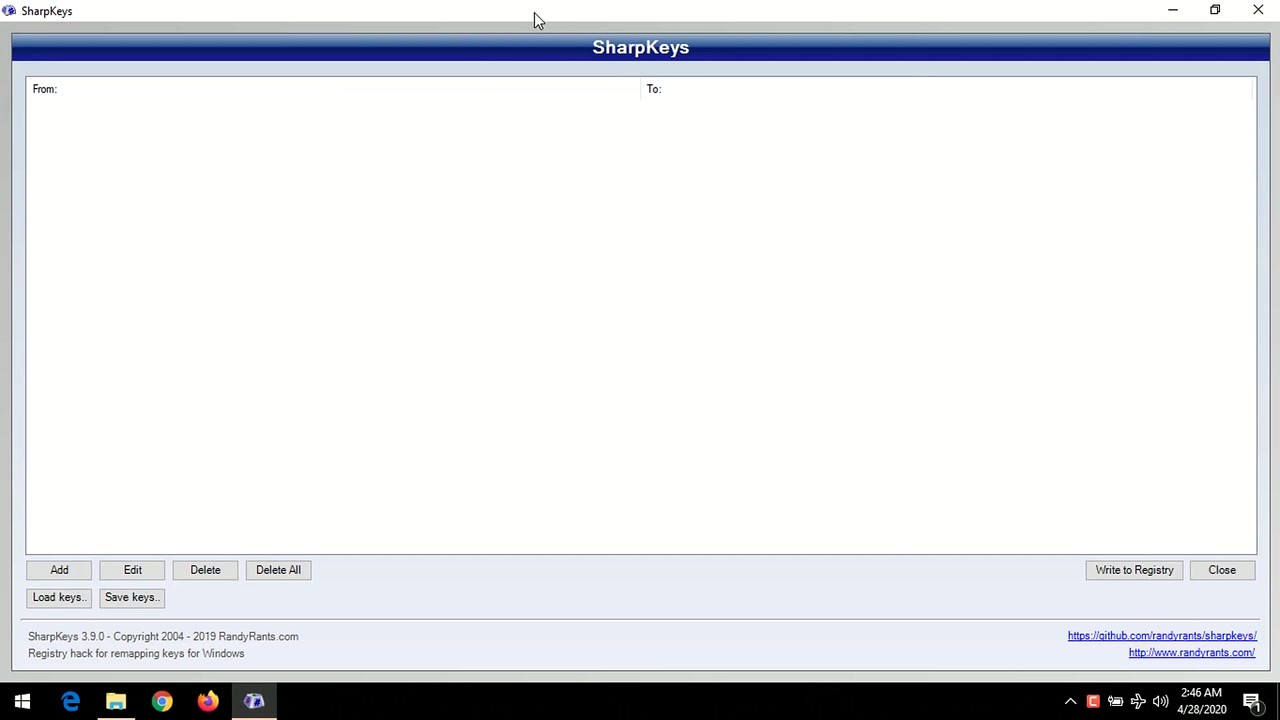
Open SharpKeys from the Start Menu. On first launch, the main window appears with an empty list — this is expected. No keys are remapped until you add them. The interface is minimal: a two-column list at the top showing “From” and “To” keys, and four buttons along the bottom.
What you see:
- Mapping list: Two columns labeled “Map this key” and “To this key.” Empty on first launch. Each row is one active remapping.
- Add button: Opens the key assignment dialog where you choose the source and destination keys.
- Delete button: Removes the selected row from the list. Does not write to registry until you click Write.
- Write to Registry: Commits all listed remappings to the Windows Registry. This is the step that actually changes keyboard behavior. Nothing takes effect until you click this.
- Close button: Exits the app. Remappings already written persist after closing.
There is no auto-save. If you close without clicking “Write to Registry,” your new mappings are lost and the keyboard is unchanged. The File menu at the top provides Import and Export options for saving your configuration to a .skl file — useful before reinstalling Windows or sharing a layout.
Your First Key Remap: Disabling Caps Lock
Disabling Caps Lock is the single most popular reason people install SharpKeys. Here is the full walkthrough. The same steps apply to any other remapping.
- Click “Add” — the key assignment dialog opens with two panels: “Map this key” (left) and “To this key” (right).
- Identify Caps Lock on the left: Either scroll the dropdown to find “Special: Caps Lock,” or click the “Type Key” button and press Caps Lock on your keyboard. SharpKeys reads the scancode and selects it automatically. The Type Key method is faster and handles obscure keys without list-hunting.
- Set the destination on the right: Scroll to the very top of the right dropdown and select “Turn Key Off (00_00).” This tells Windows to ignore the key entirely.
- Click OK — the mapping appears in the list:
Special: Caps Lock (00_3A) --> Turn Key Off (00_00) - Click “Write to Registry” — accept the UAC prompt. SharpKeys writes the Scancode Map entry to
HKEY_LOCAL_MACHINE\SYSTEM\CurrentControlSet\Control\Keyboard Layout. - Log out and back in (or restart). The registry value is read at logon, not in real time.
After logging back in, Caps Lock does nothing. The LED indicator (if present) will also stop lighting up.
Common remap examples:
| From Key | To Key | Used by |
|---|---|---|
| Caps Lock | Turn Key Off | Typists, developers avoiding accidental ALLCAPS |
| Caps Lock | Left Ctrl | Vim and Emacs users |
| Caps Lock | Escape | Vim users |
| Right Ctrl | Turn Key Off | Laptop users who keep hitting it accidentally |
| Left Windows | Turn Key Off | Gamers who keep triggering the Start menu in-game |
| Scroll Lock | Turn Key Off | Almost everyone — this key serves no function for most people |
| Insert | Turn Key Off | Users who keep accidentally entering Insert (overtype) mode |
Tips, Tricks, and Best Practices
Always click “Write to Registry” before closing. The most common beginner mistake is adding remappings, then closing SharpKeys without writing. Changes are not saved anywhere until you click that button. Nothing changes on your keyboard until you write.
Back up with File > Export before reinstalling Windows. Export saves your layout as a .skl file. Keep it with your documents. After a fresh Windows install, open SharpKeys, use File > Import, and click “Write to Registry” — your full layout is restored in under 30 seconds.
All user accounts get the same remapping. SharpKeys writes to HKEY_LOCAL_MACHINE, which is machine-wide. Every account on that PC uses the same keyboard behavior. If you need per-user remapping, PowerToys Keyboard Manager is the right tool — it stores config under HKCU.
Key combinations are out of scope. Ctrl+C, Alt+Tab, Win+L — these require intercepting keystrokes at runtime, which SharpKeys does not do. For combination-based remapping, use AutoHotkey or PowerToys Keyboard Manager.
Fn key on laptops cannot be remapped. The Fn key is intercepted by laptop firmware (BIOS/UEFI) before Windows sees it. SharpKeys can remap F1 through F12 individually, but Fn itself and Fn+key combos are outside its reach.
Frequently Asked Questions
Answers to the questions people actually ask before downloading and using SharpKeys.
Is SharpKeys free to download?
Yes, SharpKeys is completely free. There is no paid tier, no trial period, and no premium version. It is released under the MS-PL (Microsoft Public License), a permissive open-source license that allows free use for any purpose.
SharpKeys has been free since its original release and continues to be maintained without any cost to users. Randy (RandyRants LLC), the developer, keeps it open on GitHub at github.com/randyrants/sharpkeys. The full source code is public, so anyone can verify what the installer does before running it.
- License: MS-PL (permissive open source)
- Cost: $0.00, no subscription or account needed
- No ads, no bundled software, no toolbar offers
- Also available free on the Microsoft Store
Pro tip: If any site asks you to pay for SharpKeys or enter an email address to download it, that is not an official source. The only legitimate downloads are this page, GitHub Releases, and the Microsoft Store. See the Download section above for direct links.
Is SharpKeys safe for Windows 11?
Yes, SharpKeys is safe on Windows 11. Version 3.9.4, released April 4, 2025, is fully tested and working on Windows 11 Home, Pro, and Enterprise editions on both x64 and ARM64 hardware.
SharpKeys works by writing a single registry entry called the Scancode Map to HKEY_LOCAL_MACHINE\SYSTEM\CurrentControlSet\Control\Keyboard Layout. This is a documented, officially supported Windows mechanism for key remapping at the OS level. Microsoft has not deprecated or changed this in Windows 11.
- No background service or process installed
- No runtime keystroke interception
- No network access required
- Fully reversible — deleting the registry entry restores factory behavior
- Source code publicly auditable on GitHub
Pro tip: Windows SmartScreen may show a warning on first run because the publisher is not on Microsoft’s extended validation list. Click “More info” then “Run anyway.” This is standard for open-source tools and does not indicate danger.
Does SharpKeys contain malware or viruses?
No. SharpKeys is open-source software and does not contain malware, viruses, spyware, or any unwanted programs. Every line of code is publicly visible at github.com/randyrants/sharpkeys.
The MSI file on GitHub Releases comes with a SHA-256 checksum you can verify against your downloaded file to confirm it has not been tampered with. Windows Defender and most major antivirus tools (Malwarebytes, Bitdefender, Kaspersky) do not flag SharpKeys as malicious.
A few things to be aware of:
- Some AV tools flag software that writes to the registry as “potentially unwanted.” SharpKeys writes to one specific documented key — this is expected behavior.
- If your AV quarantines the file, add an exception for the SharpKeys installation folder or verify the hash manually.
- Always download from official sources: this page, GitHub Releases, or the Microsoft Store.
Pro tip: If you are extra cautious, use the portable ZIP version. Extract it, inspect the files before running. The executable is a simple .NET WinForms app with no network calls, no DRM, and no obfuscation.
What are the system requirements for SharpKeys?
SharpKeys has minimal requirements. Any modern Windows PC can run it without issues. See the System Requirements table above for full details. The short version:
- OS: Windows 10 or 11. Legacy support back to Windows XP with .NET 4.0 installed manually.
- Architecture: x64, x86, ARM, or ARM64. ARM/ARM64 support added in version 3.9.4 via the ZIP download.
- .NET Framework: 4.0 or newer. Already installed on Windows 10 and 11 by default (.NET 4.8).
- RAM: Any amount. SharpKeys uses under 30 MB while open.
- Disk: 2 MB free. The installer is 526 KB.
- Admin rights: Required to write to the Windows Registry (HKLM).
- Internet: Not required. Fully offline after download.
Pro tip: On ARM64 devices (Surface Pro X, Copilot+ PCs), use the ZIP download and run the ARM64 build. The MSI only covers x64 and x86 systems.
Does SharpKeys work on Windows 11?
Yes. SharpKeys 3.9.4 is fully compatible with Windows 11. The underlying Scancode Map registry mechanism has been supported in every Windows version since NT and continues unchanged in Windows 11.
Windows 11-specific notes to keep in mind:
- UAC prompts look slightly different on Windows 11 but function identically — click Yes to allow the registry write.
- ARM64 systems (Surface Pro X, Copilot+ PCs): use the ZIP download and run the ARM64 executable. The MSI does not include the ARM64 build.
- Existing SharpKeys installs from Windows 10 carry over through the Windows 11 upgrade without issues.
- Log-out requirement is unchanged — sign out and back in after clicking “Write to Registry.”
Pro tip: If you upgraded from Windows 10 with SharpKeys already installed and your remappings stopped working, open SharpKeys and click “Write to Registry” again. Windows upgrades sometimes reset the Keyboard Layout registry path, and a fresh write from SharpKeys restores it.
Grab the latest version from the Download section.
Does SharpKeys work on 32-bit (x86) Windows?
Yes. SharpKeys supports 32-bit (x86) Windows. Both the MSI installer and the ZIP download include an x86 build. You can run SharpKeys on 32-bit editions of Windows 10.
The remapping mechanism — writing to the Windows Scancode Map registry entry — works identically on x86 and x64 Windows. There is no functional difference between the two builds once SharpKeys writes to the registry.
If you are using the ZIP, navigate into the x86 subfolder and run SharpKeys.exe from there. The MSI installer automatically selects the correct architecture for your system.
Note: Windows 11 does not support 32-bit installations. If you are on Windows 11, your OS is 64-bit by definition. You can still run 32-bit apps including SharpKeys x86, but there is no reason to — use the x64 or ARM64 build instead.
Pro tip: To check whether your Windows installation is 32-bit or 64-bit, right-click “This PC,” go to Properties, and look at “System type.” If it says “64-bit operating system,” run the x64 version.
How do I install SharpKeys on Windows?
Installing SharpKeys takes about 30 seconds. Download the MSI file from the Download section, double-click it, and follow the short wizard. Full instructions are in the Getting Started guide above. Quick summary:
- Download
sharpkeys394.msifrom the Download section on this page - Double-click the downloaded file
- Click Yes on the UAC prompt
- If SmartScreen appears, click “More info” then “Run anyway”
- Click Next, accept the MS-PL license, choose install path, click Install
- Click Finish when complete
SharpKeys appears in the Start Menu immediately. No restart needed to open it. A log-out or restart is only needed after you write remappings to the registry.
For portable use without installing, download the ZIP instead. Extract it and run SharpKeys.exe from the correct architecture subfolder (x64, x86, ARM, or ARM64).
Pro tip: If your workplace blocks MSI installations via Group Policy, the ZIP version runs without requiring an installer — only administrator rights are needed when writing to the registry inside SharpKeys.
What is the difference between the MSI installer and the ZIP download?
Both contain the same SharpKeys application. The difference is delivery and included architectures.
MSI installer (sharpkeys394.msi):
- Installs to C:\Program Files\SharpKeys by default
- Creates a Start Menu shortcut
- Handles .NET Framework version check automatically
- Shows in Apps & Features for clean uninstall
- Includes x64 and x86 builds only — no ARM or ARM64
- Best for: standard Windows 10/11 desktop and laptop users
ZIP portable (sharpkeys394.zip):
- No installation — extract anywhere and run
- Includes x64, x86, ARM, and ARM64 builds
- No Start Menu shortcut or Apps & Features entry
- Runs from USB drives or network shares
- Best for: ARM64 machines, portable setups, corporate environments with install restrictions
Pro tip: If you are on a Surface Pro X or any Snapdragon-based Windows laptop, you must use the ZIP — the MSI does not include an ARM64 binary. Extract the ZIP and run SharpKeys.exe from the ARM64 subfolder.
Why do I need to log out after remapping keys in SharpKeys?
SharpKeys modifies the Windows Scancode Map registry entry, which is read by the keyboard driver at logon time — specifically when a Windows session starts. The new mapping only takes effect when a fresh session begins. Log out and back in (or restart) for the change to apply.
This is not a SharpKeys quirk — it is how Windows keyboard remapping is designed to work. The keyboard driver reads the Scancode Map once when it initializes during boot or logon. No application can hot-swap this entry mid-session without reloading the driver.
What to do after clicking “Write to Registry” in SharpKeys:
- Save any open work
- Open Start, click your user icon, select “Sign out”
- Sign back in to your Windows account
- Your remapping is now active
A full restart also works. You do NOT need to keep SharpKeys open after writing — close it after clicking Write. The remapping lives in the registry, not in the app. SharpKeys only needs to be running when you are actively changing mappings.
Pro tip: You can write multiple remappings in one session (add them all to the list first, then click Write once). You only need to log out once regardless of how many remappings you added.
How do I undo or remove a key remapping in SharpKeys?
Removing a remapping is quick and fully reversible. Open SharpKeys, select the row you want to remove, click Delete, then click “Write to Registry.” Log out and back in to apply the change.
Step-by-step:
- Open SharpKeys from the Start Menu
- Click the mapping row you want to remove (it highlights when selected)
- Click Delete — the row disappears from the list
- Click “Write to Registry” to commit the change
- Accept the UAC prompt
- Log out and back in (or restart)
The key returns to factory default behavior. To remove all remappings at once, delete every row from the list before clicking Write. An empty list writes an empty Scancode Map, which restores all keys to their original behavior.
Pro tip: If you plan to uninstall SharpKeys, delete all mappings and write to registry first. If you uninstall without clearing the registry, your remappings remain active because they live in the registry — not in the app. The app can be gone but the keyboard still behaves as configured until you clear the registry entry manually.
SharpKeys is not working — how do I fix it?
If remappings are not taking effect, work through these fixes in order:
- Did you click “Write to Registry”? Adding rows to the list does nothing until you write. Open SharpKeys — if your mapping is listed, click Write and try the log-out/in cycle again.
- Did you log out and back in (or restart)? The registry change takes effect at logon, not immediately.
- Run SharpKeys as administrator. Right-click the shortcut and select “Run as administrator.” Standard accounts may not have permission to write to HKLM.
- Check for conflicting keyboard software. Gaming keyboards from Corsair (iCUE), Razer (Synapse), and Logitech (G Hub) manage key behavior at the driver level and can override the Scancode Map. Temporarily disable your keyboard software and test SharpKeys without it.
- Is the key a hardware Fn key? Fn combinations on laptops are intercepted by BIOS/UEFI before Windows sees them. SharpKeys cannot remap Fn itself or Fn+key combos.
- Try a full restart instead of a log-out. Some edge cases require a complete power cycle.
- After a Windows update, re-apply. Updates occasionally reset the Keyboard Layout registry path. Open SharpKeys and click “Write to Registry” again to re-apply all mappings.
Pro tip: If the issue persists, check the GitHub issues at github.com/randyrants/sharpkeys/issues for known compatibility problems with specific keyboard models or Windows builds.
How do I update SharpKeys to the latest version?
SharpKeys has no built-in auto-updater. To update, download the latest MSI from the Download section and run it over your existing installation. Your registry remappings are not affected by the update — they persist independently in the registry.
Update steps:
- Download the latest
sharpkeys394.msifrom this page or GitHub - Double-click the installer — it updates the existing installation
- No need to uninstall first
- Your existing key mappings in the registry remain unchanged
The current version is 3.9.4, released April 4, 2025. If you installed from the Microsoft Store, updates happen automatically when a new Store release is published.
To check your current version, open SharpKeys and look at the title bar — it displays the version number. You can also right-click SharpKeys.exe in the installation folder, go to Properties > Details, and check the file version field.
Pro tip: Watch the GitHub repository (github.com/randyrants/sharpkeys) to get notified of new releases. New versions usually come out when significant Windows updates introduce compatibility changes or when new hardware platforms (like ARM64) require updated builds.
How do I disable Caps Lock with SharpKeys?
Disabling Caps Lock takes about 30 seconds in SharpKeys. You remap Caps Lock to “Turn Key Off” — a special option that makes Windows completely ignore the key.
- Open SharpKeys from the Start Menu
- Click Add
- In the “Map this key” (left) panel, either scroll to “Special: Caps Lock” or click “Type Key” and press the Caps Lock key — SharpKeys identifies it automatically
- In the “To this key” (right) panel, scroll to the very top and select “Turn Key Off (00_00)”
- Click OK
- Click “Write to Registry” and accept the UAC prompt
- Log out and log back in (or restart)
After logging back in, pressing Caps Lock does nothing. The LED indicator (if present) also stops lighting up. All other keys work normally.
Common Caps Lock remaps developers prefer:
- Caps Lock → Turn Key Off: eliminates accidental ALLCAPS completely
- Caps Lock → Left Ctrl: popular with Vim and Emacs users for ergonomic Ctrl placement
- Caps Lock → Escape: common for Vim users who need Escape in normal mode frequently
Pro tip: To re-enable Caps Lock at any time, open SharpKeys, select the row, click Delete, click Write to Registry, and log out/in. The key returns to default behavior immediately after the log-out cycle.
SharpKeys vs PowerToys Keyboard Manager — which is better?
SharpKeys and Microsoft PowerToys Keyboard Manager both remap keys, but they work differently and suit different needs. Neither is universally “better” — the right choice depends on what you need.
SharpKeys is the better choice when:
- You want to remap or disable individual keys permanently with zero background overhead
- You do not want any process running in the background after setup
- You need it to apply to all user accounts on the machine
- You are on an older Windows version (XP through 11)
- You want a simpler, faster interface for basic remaps
PowerToys Keyboard Manager is the better choice when:
- You need to remap key combinations (Ctrl+C to something else, Win+L, etc.)
- You want different keyboard behavior in different apps (per-application remapping)
- You want per-user scope (different accounts on the same PC have different layouts)
- You are already using PowerToys for its other 20+ utilities
The practical advice: use SharpKeys for simple permanent remaps like disabling Caps Lock or the Windows key. Use PowerToys for complex scenarios involving key combinations or app-specific shortcuts.
Pro tip: Both tools can run on the same machine without conflict. SharpKeys handles the OS-level scancode remaps; PowerToys handles the runtime hotkey layer. Many developers run both for different purposes.
SharpKeys vs AutoHotkey — what is the difference?
SharpKeys and AutoHotkey (AHK) are both keyboard tools, but they work at completely different layers and serve different purposes.
SharpKeys writes to the Windows Scancode Map once and exits. No process needs to stay running. It remaps individual physical keys at the OS level, and the remapping applies everywhere, always, without overhead.
AutoHotkey is a full-featured scripting language. It intercepts keystrokes at runtime, which means a process must be running in the background for your hotkeys to work. If the AHK process is killed, your hotkeys stop. In exchange, AHK can do things SharpKeys cannot:
- Remap key combinations (Ctrl+J to something specific)
- Create macros (press one key to type a long phrase or run a command)
- Conditional behavior (different actions depending on which window is active)
- Full scripting: loops, variables, file I/O, GUI creation
For simply disabling Caps Lock or swapping two keys permanently, SharpKeys is significantly simpler and leaves zero footprint. For macro creation, hotkey automation, or complex conditional behavior, AutoHotkey is the right tool.
Pro tip: Many users run both in parallel. SharpKeys handles physical key remaps (Caps Lock off, Scroll Lock off, Windows key off for gaming). AutoHotkey handles dynamic macros and window-specific shortcuts. They operate at different layers and do not conflict.
Can SharpKeys remap key combinations like Ctrl+C?
No. SharpKeys cannot remap key combinations. It operates at the Windows Scancode Map level, which handles individual physical keys only — not key combinations involving simultaneous presses.
What SharpKeys can do is remap the individual Ctrl key itself. For example, you can remap Caps Lock to act as Ctrl, effectively moving Ctrl to a more ergonomic position. But you cannot make Ctrl+C produce a different result — that requires hooking keystrokes at runtime, which is outside SharpKeys’ scope.
Tools that support combination remapping:
- PowerToys Keyboard Manager: Free from Microsoft. Remaps individual keys and full combinations (Ctrl+C, Win+Shift+S, etc.). Also supports per-app remapping.
- AutoHotkey: Free scripting tool. You can write a one-line script to rebind any combination to any action:
^c::Send, {something} - Hardware keyboard software: Corsair iCUE, Razer Synapse, Logitech G Hub — if your keyboard has onboard memory, you can program combination macros directly on the hardware without any software running on Windows.
Pro tip: If your goal is only to remap or disable individual keys, SharpKeys is simpler and leaves no footprint. Save PowerToys or AutoHotkey for when you actually need combination-based remapping.
Does SharpKeys work for all user accounts on the same PC?
Yes. SharpKeys writes to HKEY_LOCAL_MACHINE (HKLM), the system-wide registry hive. Every user account on that Windows installation inherits the same keyboard behavior. This is machine-wide, not per-user.
If you share a computer with others and remap Caps Lock to Escape, every person who logs in will find Caps Lock behaving as Escape. There is no way to configure SharpKeys differently for different accounts — that is a fundamental consequence of using the HKLM registry path.
If you need per-user keyboard remapping:
- PowerToys Keyboard Manager stores its configuration in HKEY_CURRENT_USER (HKCU), meaning each account on the same machine can have a completely different keyboard layout. Himesh’s account can have Caps Lock as Escape; a guest account can have the default layout.
- AutoHotkey also runs per-user — each user runs their own .ahk script on login, enabling different configurations per account.
SharpKeys is the right choice for personal machines or for shared machines where all users agree on the same layout (many offices disable Caps Lock system-wide, for example).
Pro tip: Administrator privileges are required to write the machine-wide registry entry. Standard user accounts without admin rights can open SharpKeys and view existing mappings but cannot add, delete, or write new ones.
How many keys can SharpKeys remap at once?
SharpKeys supports up to 104 simultaneous key remappings. This covers every key on a standard 104-key keyboard, meaning you could technically remap all of them at once if needed.
In practice, most users configure between 1 and 5 remappings. Common setups:
- 1 remap: Disable Caps Lock (most common)
- 2-3 remaps: Disable Caps Lock + Scroll Lock + Insert
- 4-5 remaps: The above plus moving a modifier key (Ctrl to a different position)
Each row in the SharpKeys list counts as one mapping slot. You can add, edit, and delete rows freely. When you click “Write to Registry,” SharpKeys writes the complete current list to the registry in a single operation — it does not write incrementally.
The 104-mapping limit is a constraint of the Windows Scancode Map registry format, which uses a fixed-size byte structure for the mapping table. Nobody reaches this limit in normal use.
Pro tip: Use File > Export after building a complex layout. This saves a .skl file you can restore on any machine: import, click Write, log out/in. All mappings applied in one go.
Does SharpKeys work without an internet connection?
Yes, SharpKeys works completely offline. Once installed, it requires no internet access. The application makes zero network requests — it communicates only with the local Windows Registry.
This is one of SharpKeys’ practical advantages over some tools that require online license validation, telemetry uploads, or cloud sync. SharpKeys is a self-contained .NET WinForms application. There is no cloud component, no telemetry, and no analytics.
Air-gapped machines, corporate environments without internet access, and standalone offline workstations all run SharpKeys without issues. You can transfer the installer via USB or a network share and install it on any machine without that machine needing to reach the internet during or after installation.
The remapping itself also works offline — the registry entry is read by Windows at logon regardless of network connectivity. The keyboard behaves as remapped whether or not the machine has an active internet connection.
Pro tip: For fully offline deployments, use the ZIP version. It requires no installation at all — extract to a USB drive, run on the target machine, write your mappings, and done. No installation footprint, no internet, and the registry entry persists after you remove the USB drive.
Where is the official download for SharpKeys?
The three official sources for SharpKeys are this website (sharpkeys.net), the GitHub Releases page (github.com/randyrants/sharpkeys/releases), and the Microsoft Store. All three sources provide the same version from the same developer and are equally safe.
Direct download links for version 3.9.4:
- MSI installer: github.com/randyrants/sharpkeys/releases/download/v3.9.4/sharpkeys394.msi
- ZIP portable: github.com/randyrants/sharpkeys/releases/download/v3.9.4/sharpkeys394.zip
- Microsoft Store: Search “SharpKeys” in the Store app, or use the Store link in the Download section
Be cautious of third-party download sites. Many sites (CNET, Softonic, Filehippo) wrap free software in their own “download manager” installers that bundle adware. Always use one of the three official sources above.
To verify any download, compare the SHA-256 hash of the file against the hash listed on the GitHub Releases page next to each file.
Pro tip: Bookmark the Download section on this page — it is kept updated with the latest direct links to the official MSI and ZIP from GitHub, so you always get the current release without navigating GitHub yourself.